 Import Data Templates
Imports
Import purchase orders into Business Central from Excel or CSV
Turn the order files your suppliers and systems already produce into Business Central purchase orders, headers and lines included.
Purchase orders often arrive as files: a spreadsheet from a procurement portal, a CSV export from a planning tool or a webshop, a list prepared by a colleague in Excel. Business Central has no built-in import for such a file, so the orders are re-keyed by hand, or the file is reshaped to fit Edit in Excel, line by line, order by order.
With Import Data Templates, a key user describes the file once in a template: which column is the vendor, which the item, which the quantity, what marks the start of a new order. From then on, every file with that layout becomes purchase orders in one import, started from the Purchase Orders page itself.
What the file can look like
The file keeps its original layout; the template adapts to it, not the other way round. One row per order line is the usual shape, with the header data repeated on each row or given once: a CSV or Excel export, or the JSON or XML a procurement portal or an API produces. A single file can hold one order or many, also for the same vendor, and the columns can be in any order and under any names, including the supplier's own item numbers.
The sample below is one of the layouts that ship with the app: three orders for three vendors, one row per line, with the Vendor Order No. column telling the import where an order ends and the next begins.
Sample file: PurchaseOrder-MultiDocument.csv
- Sample file: PurchaseOrder-MultiDocument.csv
How the import works
-
Load the template
The ready-made template for this layout,
EX-PO-MULTIDOC, is created from the Template Examples page. For a file of your own, fill in the template with the structure of the file, use Read Structure from File to build it from the column headers, or let Copilot propose it from a sample file and review it before keeping it.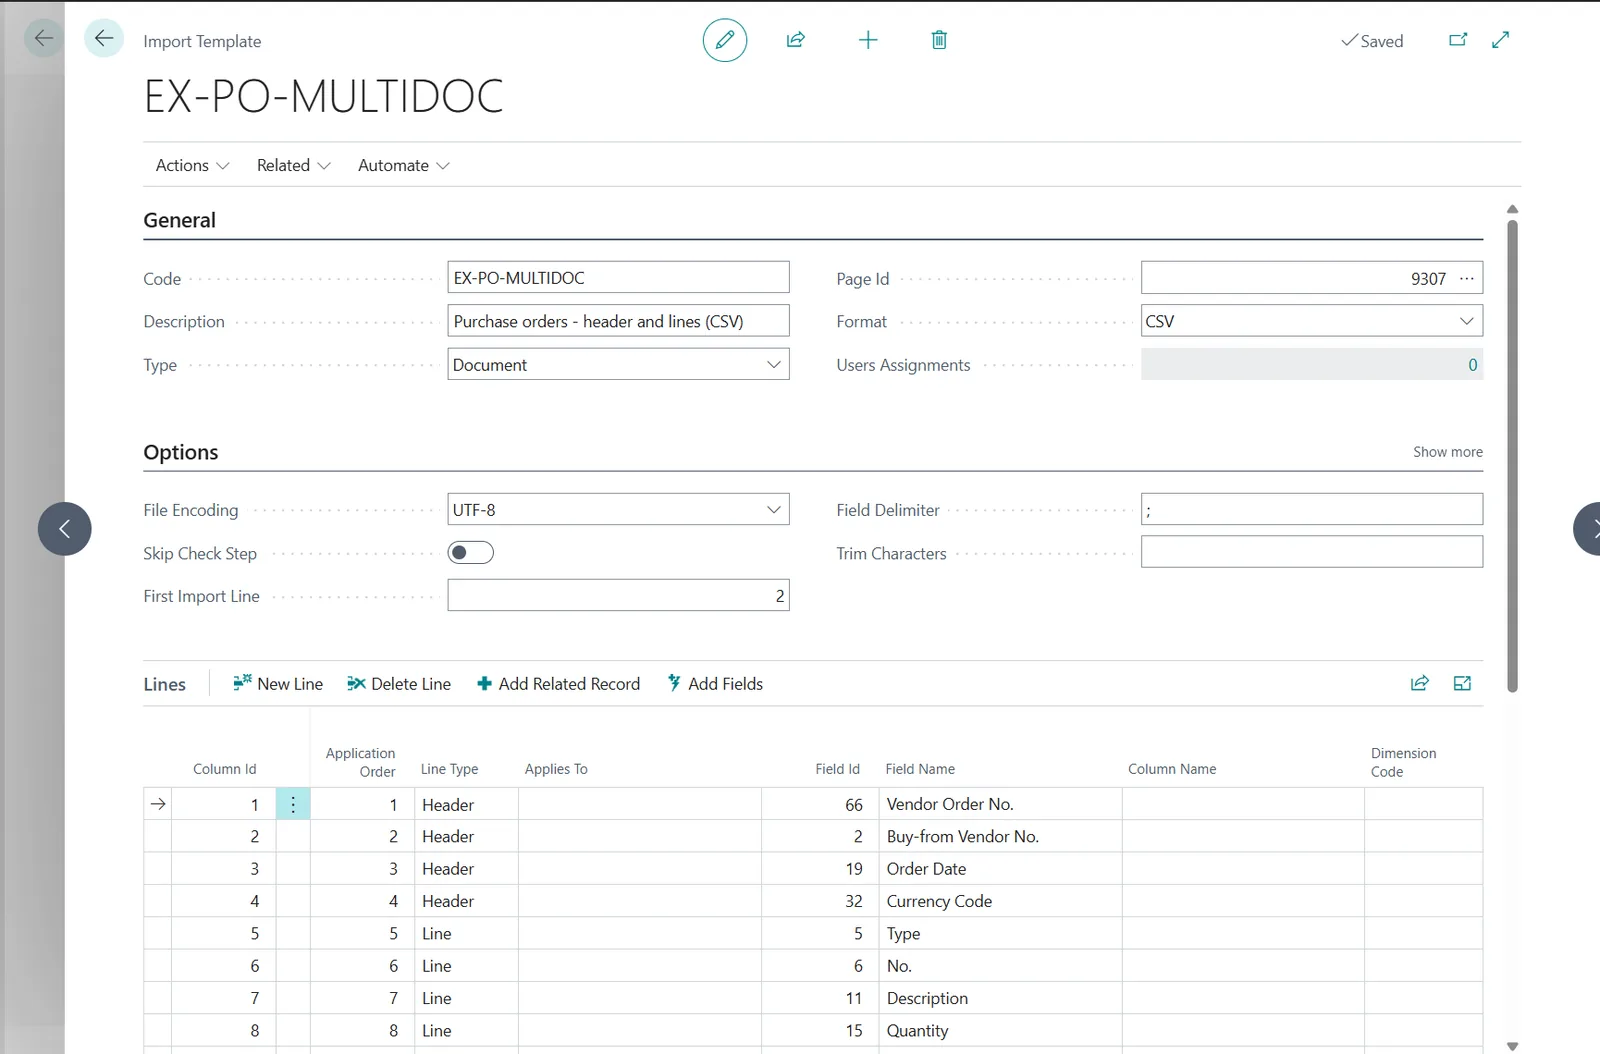
The EX-PO-MULTIDOC template: header and line fields mapped to the columns of the file. -
Start the import from Purchase Orders
The import is an action on the Purchase Orders list itself: choose Import Template, pick the template and the file. The check step validates every value the way Business Central would validate it typed in, and lists the errors with the line of the file that caused them, before the orders are created.
The whole flow: Import Template on the Purchase Orders list, the template, the file, the created orders. -
Work with the orders
When the file passes, the orders are created with their lines, numbered by the number series, exactly as if they had been entered by hand: ready to be reviewed and released, or released automatically by the template. The import history keeps the file, the user and the result, and can refuse a file that was already imported once.
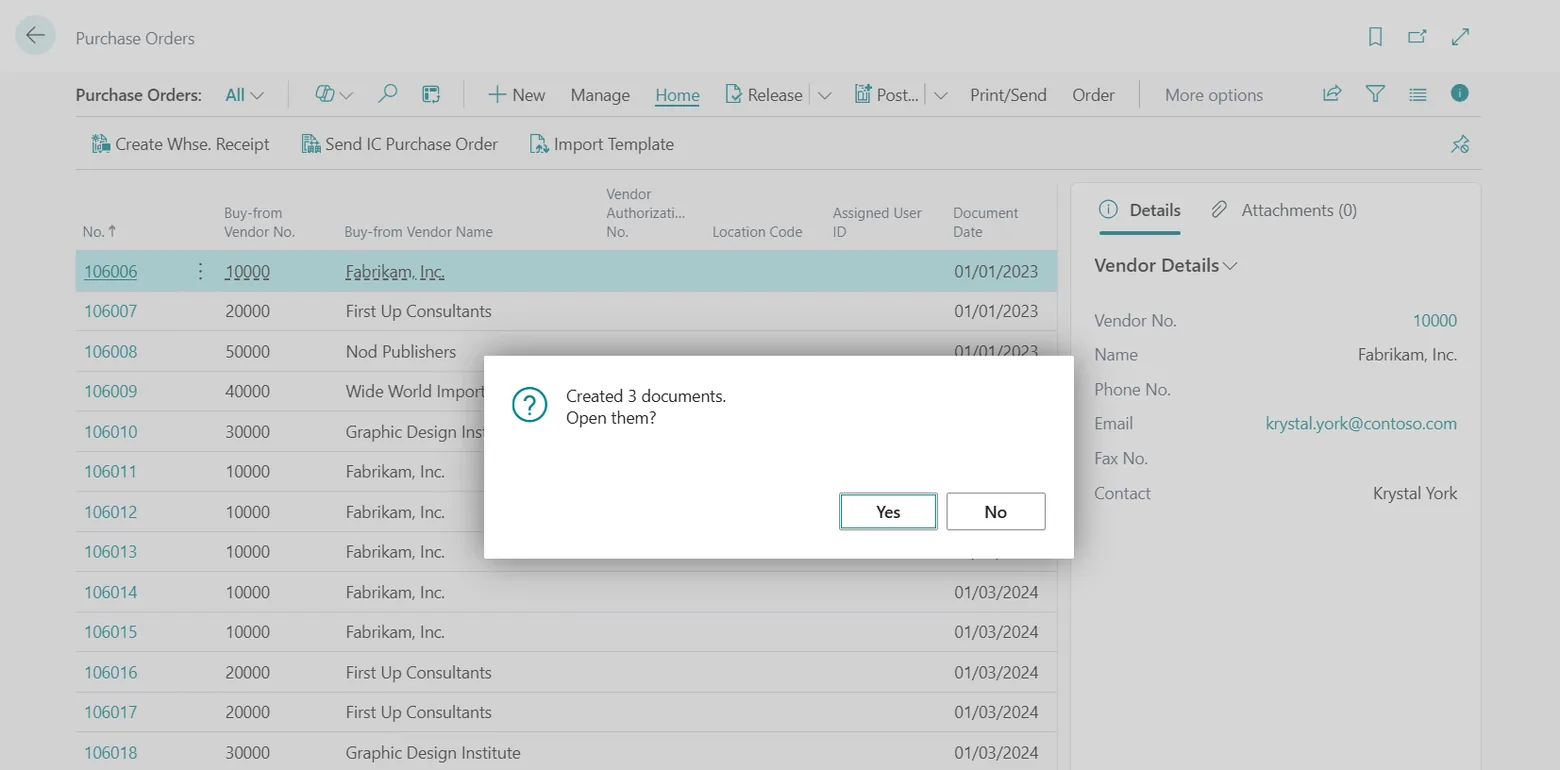
The result of the sample file: three purchase orders.
Beyond the basic file
Real supplier files are rarely clean, and most of what makes them awkward is handled in the template rather than in Excel:
- The supplier uses its own item numbers or barcodes: map that column to Item Reference No. and Business Central resolves the item through the vendor's item references.
- The supplier's codes differ from yours (units of measure, currencies): a mapping rule translates them during the import.
- The order data sits above the lines, as in a printed order saved to Excel: header values can be read from fixed rows.
- The lines carry lot or serial numbers and expiration dates: the tracking is imported with the lines, and rows that differ only by lot can be grouped into one line, as in the
EX-PO-LOTSexample. - The file carries rows that should not become lines, such as cancelled positions: a row filter skips them.
- A value is not in the file at all, like the posting date or a fixed G/L account: default values fill it, and import parameters ask the user when the import starts.
- Orders should leave the list ready for the next step: a template action releases them at the end of the import.
- Many files arrive at once: a ZIP archive imports them in one run. And when the files land in a SharePoint, Azure Blob Storage or Azure File Share folder, the automatic imports pick them up without a user.
The other three purchase-order examples show these options at work: EX-PO-SIMPLE, EX-PO-FIXEDHDR and EX-PO-ADVANCED, all with their sample files on the examples page.
Questions
Can one file contain orders for several vendors?
Yes. Each order carries its own Buy-from Vendor No.; the Vendor Order No. column separates the orders.
What if the supplier uses its own item numbers?
Map the column to Item Reference No. instead of No.: Business Central resolves the item through the vendor item references. A mapping rule can also translate the codes before validation.
Can the orders be released automatically?
Yes, with the template action that releases the documents at the end of the import, as in the EX-PO-ADVANCED example.
Import Data Templates is available on Microsoft AppSource with a one-month free trial. Licenses are assigned per user in the Microsoft 365 admin center.